Metalcasting Instructable: Demonstrations for home and classrooms
The following is a list of the necessary tools and equipment needed to perform a foundry in a box/metalcasting instructable at home or in a classroom.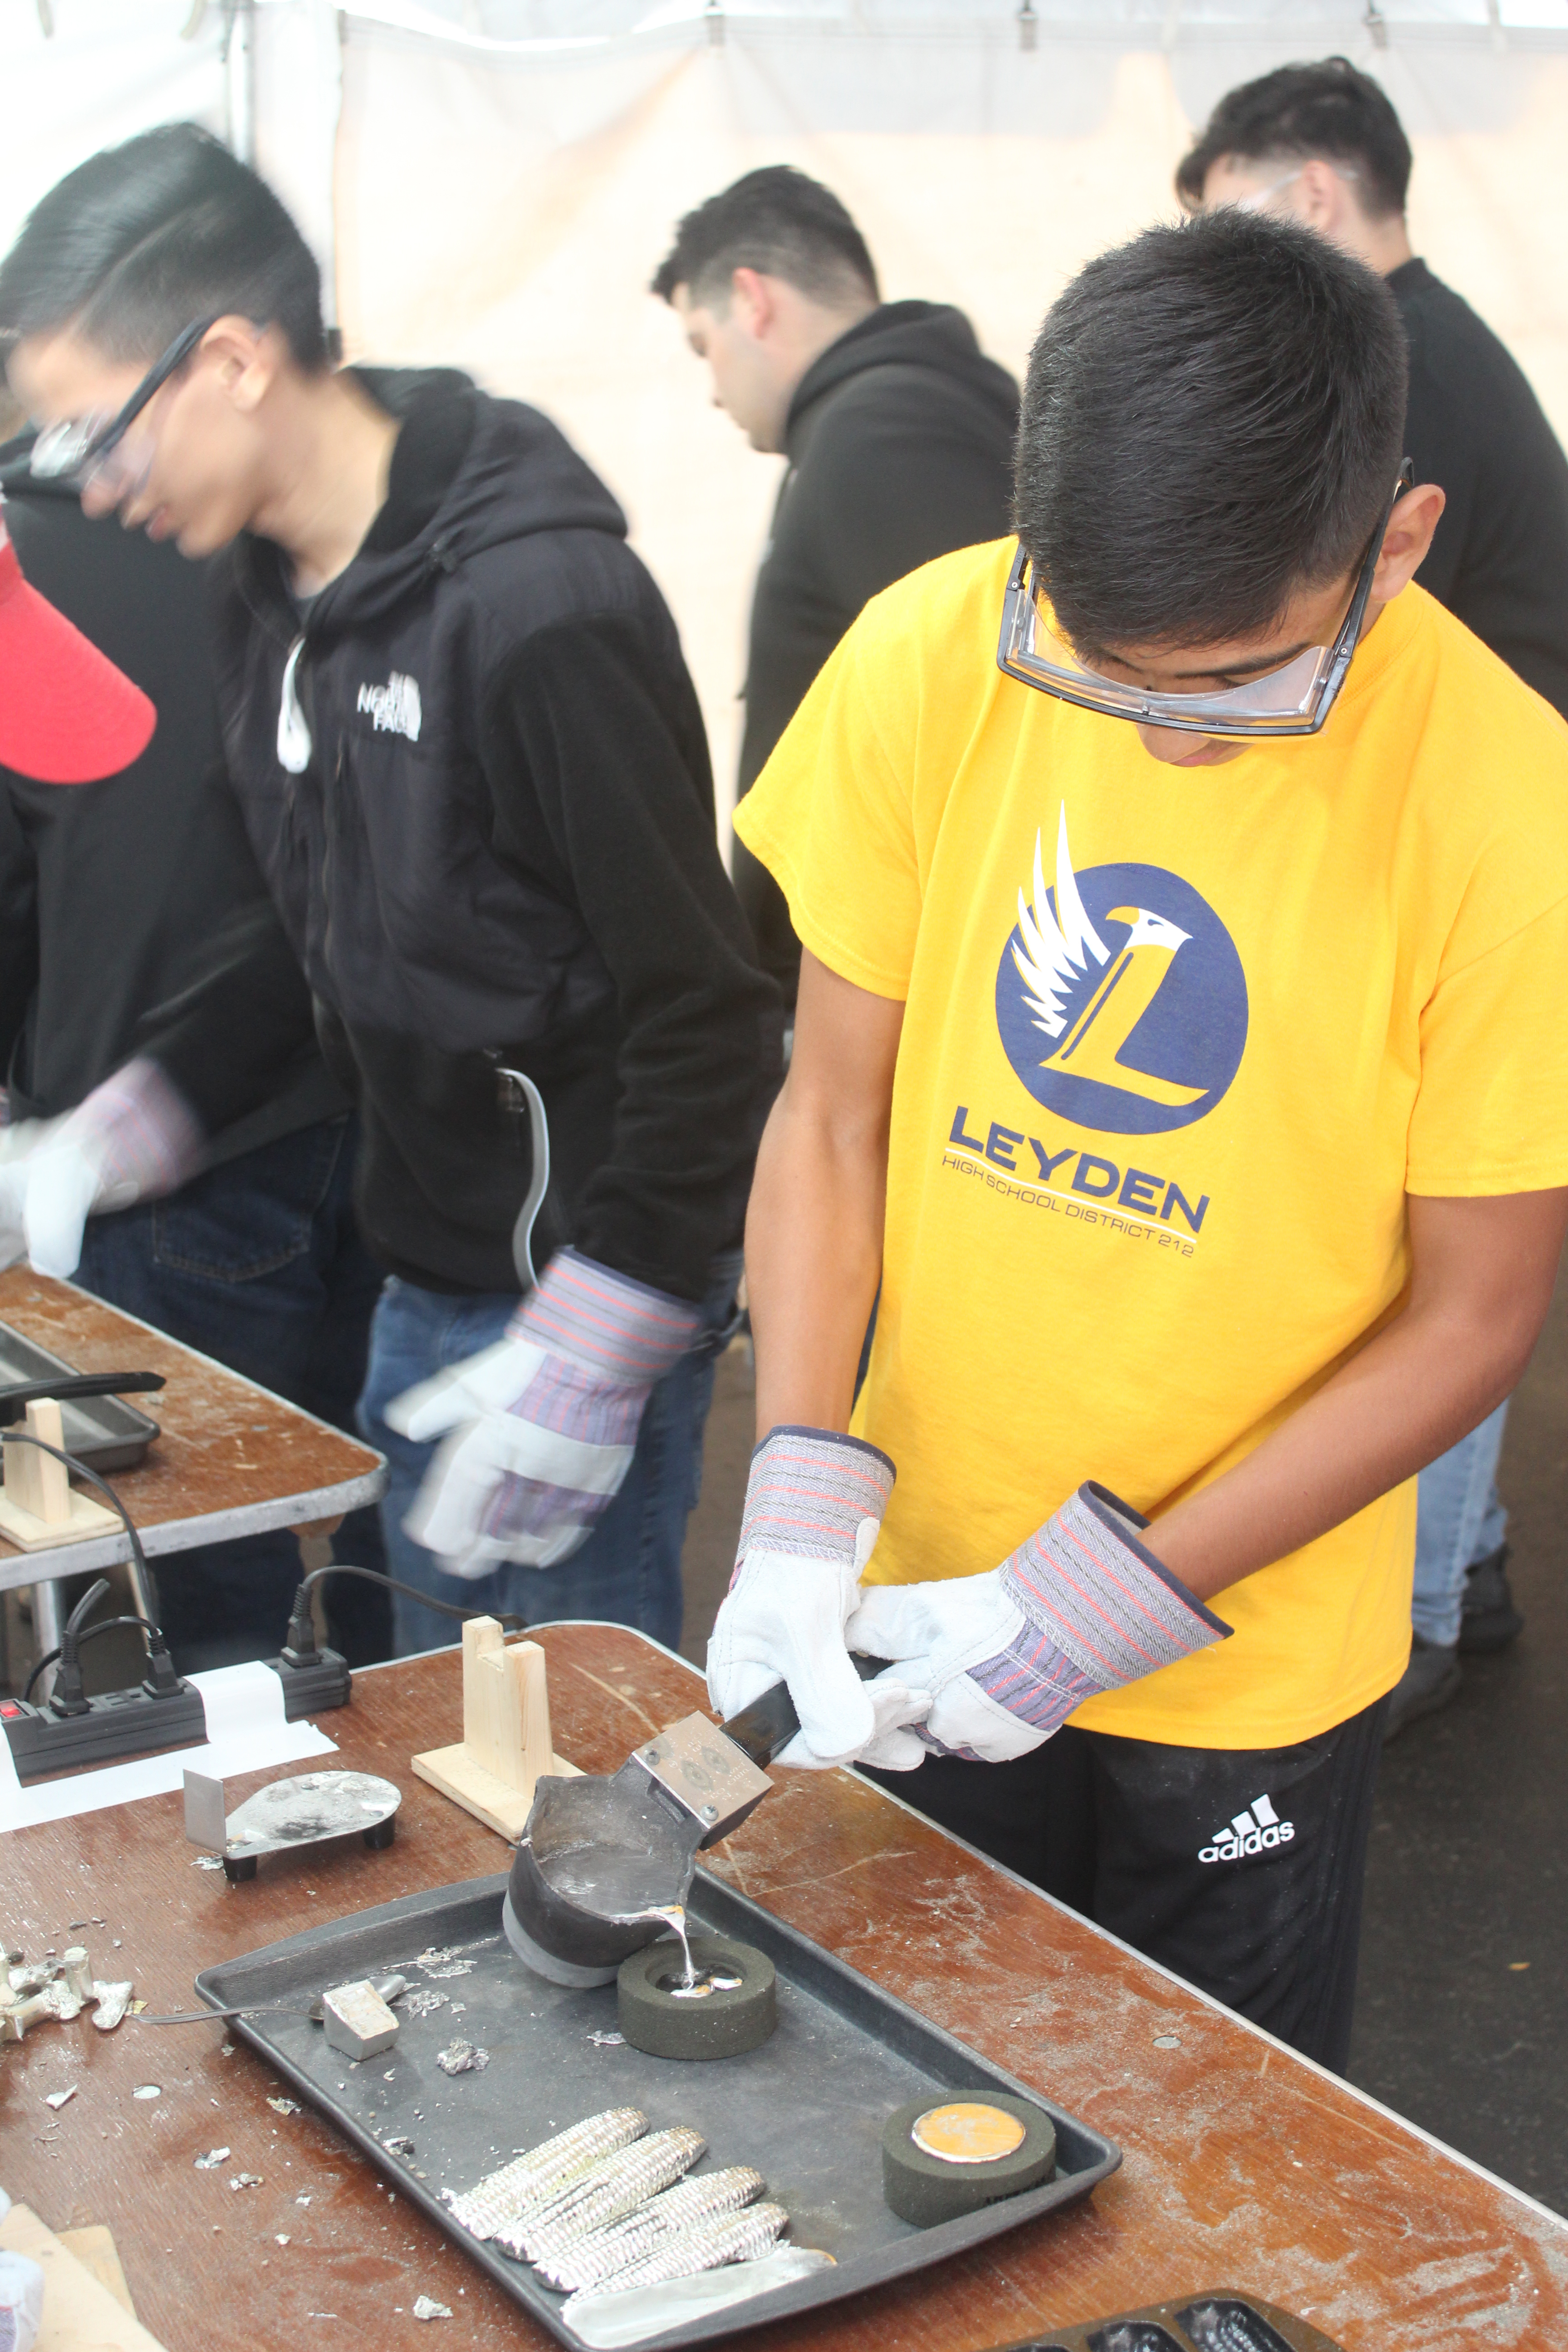
SAFETY CLOTHING & EQUIPMENT
- ANSI rated safety glasses with side shields
- Closed toe shoes
- Heat resistant gloves
- Latex/neoprene gloves
- Natural fiber clothing with long sleeves and pants recommended
SAFETY PRACTICES
People
- All persons within 10 feet of metal pouring and sand preparation must wear safety glasses with side shields. Normal prescription glasses are not acceptable unless they are approved safety glasses with side shields.
- All persons within the hazard zone who are making molds or pouring metals must wear close toed shoes. No flip flops or sandals.
- When pouring or handling metal, wear heat resistant gloves.
- When preparing molds or working with sand, wear throw-away latex/neoprene gloves to prevent dermatitis from any chemicals in the sand.
Hot Pot
- Each pot will require an appliance (minimum 12 gauge) extension cord. Please refer to the specifications of your hot pot for additional electrical safety information.
MATERIALS
- Flasks
- Binder clamps
- Patterns
- Bottom boards – ¼” thick pieces of wood slightly wider than the flasks
- Sprue cutters
- K-Bond Molding Sand
- Sand rammers - something to compact the sand
- Strike-off bar – something to scrap off the sand from the mold
- Pure tin – sources: Metal Shipper, RotoMetals, Alpha Metals, Amazon
- Hot pot
- Spoon
- Tin snips
- Metal files
- Cast iron, aluminum, or steel pan to pour any left over liquid tin
- Tooth brushes
Patterns
A pattern is used to make an impression in the sand which will then be filled with liquid metal. The metal solidifies and the result is a duplicate of the pattern. The pattern is used over again to produce another mold. There are many ways to make patterns. Please check out our metalcasting pattern instructable for one option.
K-Bond Molding Sand
The K-Bond molding sand requires no mixing or mulling and can be used many times without any additions to it. Do not add water to the K-bond molding sand. The sand will work much better if it can be at least room temperature. K-Bond sand can be purchased ready-made from Kent State University.
Making the Mold
- Assemble a pattern inside the flasks and clamp with binder clamps.
- Apply a small amount of baby power which acts as a release agent to allow the sand to not stick to the pattern.
- Ram (compact) the drag (bottom) side of the matchplate pattern first. In this position, the alignment pins on the flask will be pointing down.
- After the flask has been rammed with sand, use the strike-off bar to make the surface flat.
- Using a bottom board, flip the flask and pattern over.
- Note the position of the sprue. The sprue cutter can be placed in the correct position before ramming the sand.
- Ram the cope (top) side of the matchplate. In this position, the alignment pins on the flask will be pointing up.
- Remove the cope and check to make sure that the sprue has come all the way through the cope. If it has not come all the way through, open up the hole.
- Remove the matchplate.
- Blow any loose sand out of the mold and then close it.
- Clamp the two flask halves together with the binder clamps.
Melting & Pouring the Tin
- Initially, add only enough tin metal (either shot or ingot form) to the pot so that when melted, the tin will drop down into the pot. Continue to add tin until the pot is ¾ full. Stir liquid in pot to ensure complete melting prior to pouring.
- If this is the first melt from a room temperature pot, it will take approximately 10 minutes to melting.
- If this pot is emptied and hot, it will take approximately 5 minutes to recharge the pot to ¾ full liquid.
- At this point, the tin is over 450°F.
- Skim any dross off the liquid tin.
- Pour directly from the pot.
- If pouring additional molds, add more solid tin to the pot.
- Any excess metal can be cast into the small cast iron cornbread style ingot tray.
- CAUTION!! NEVER ADD WET METAL TO LIQUID METAL IN THE CRUCIBLE. This can cause a small steam explosion and it may splash metal out of the pot. Always wear safety glasses.
- It takes about 3-5 minutes for the metal in the mold to fully cool and solidify.
Cleaning & Finishing
- After cooling, remove the cope.
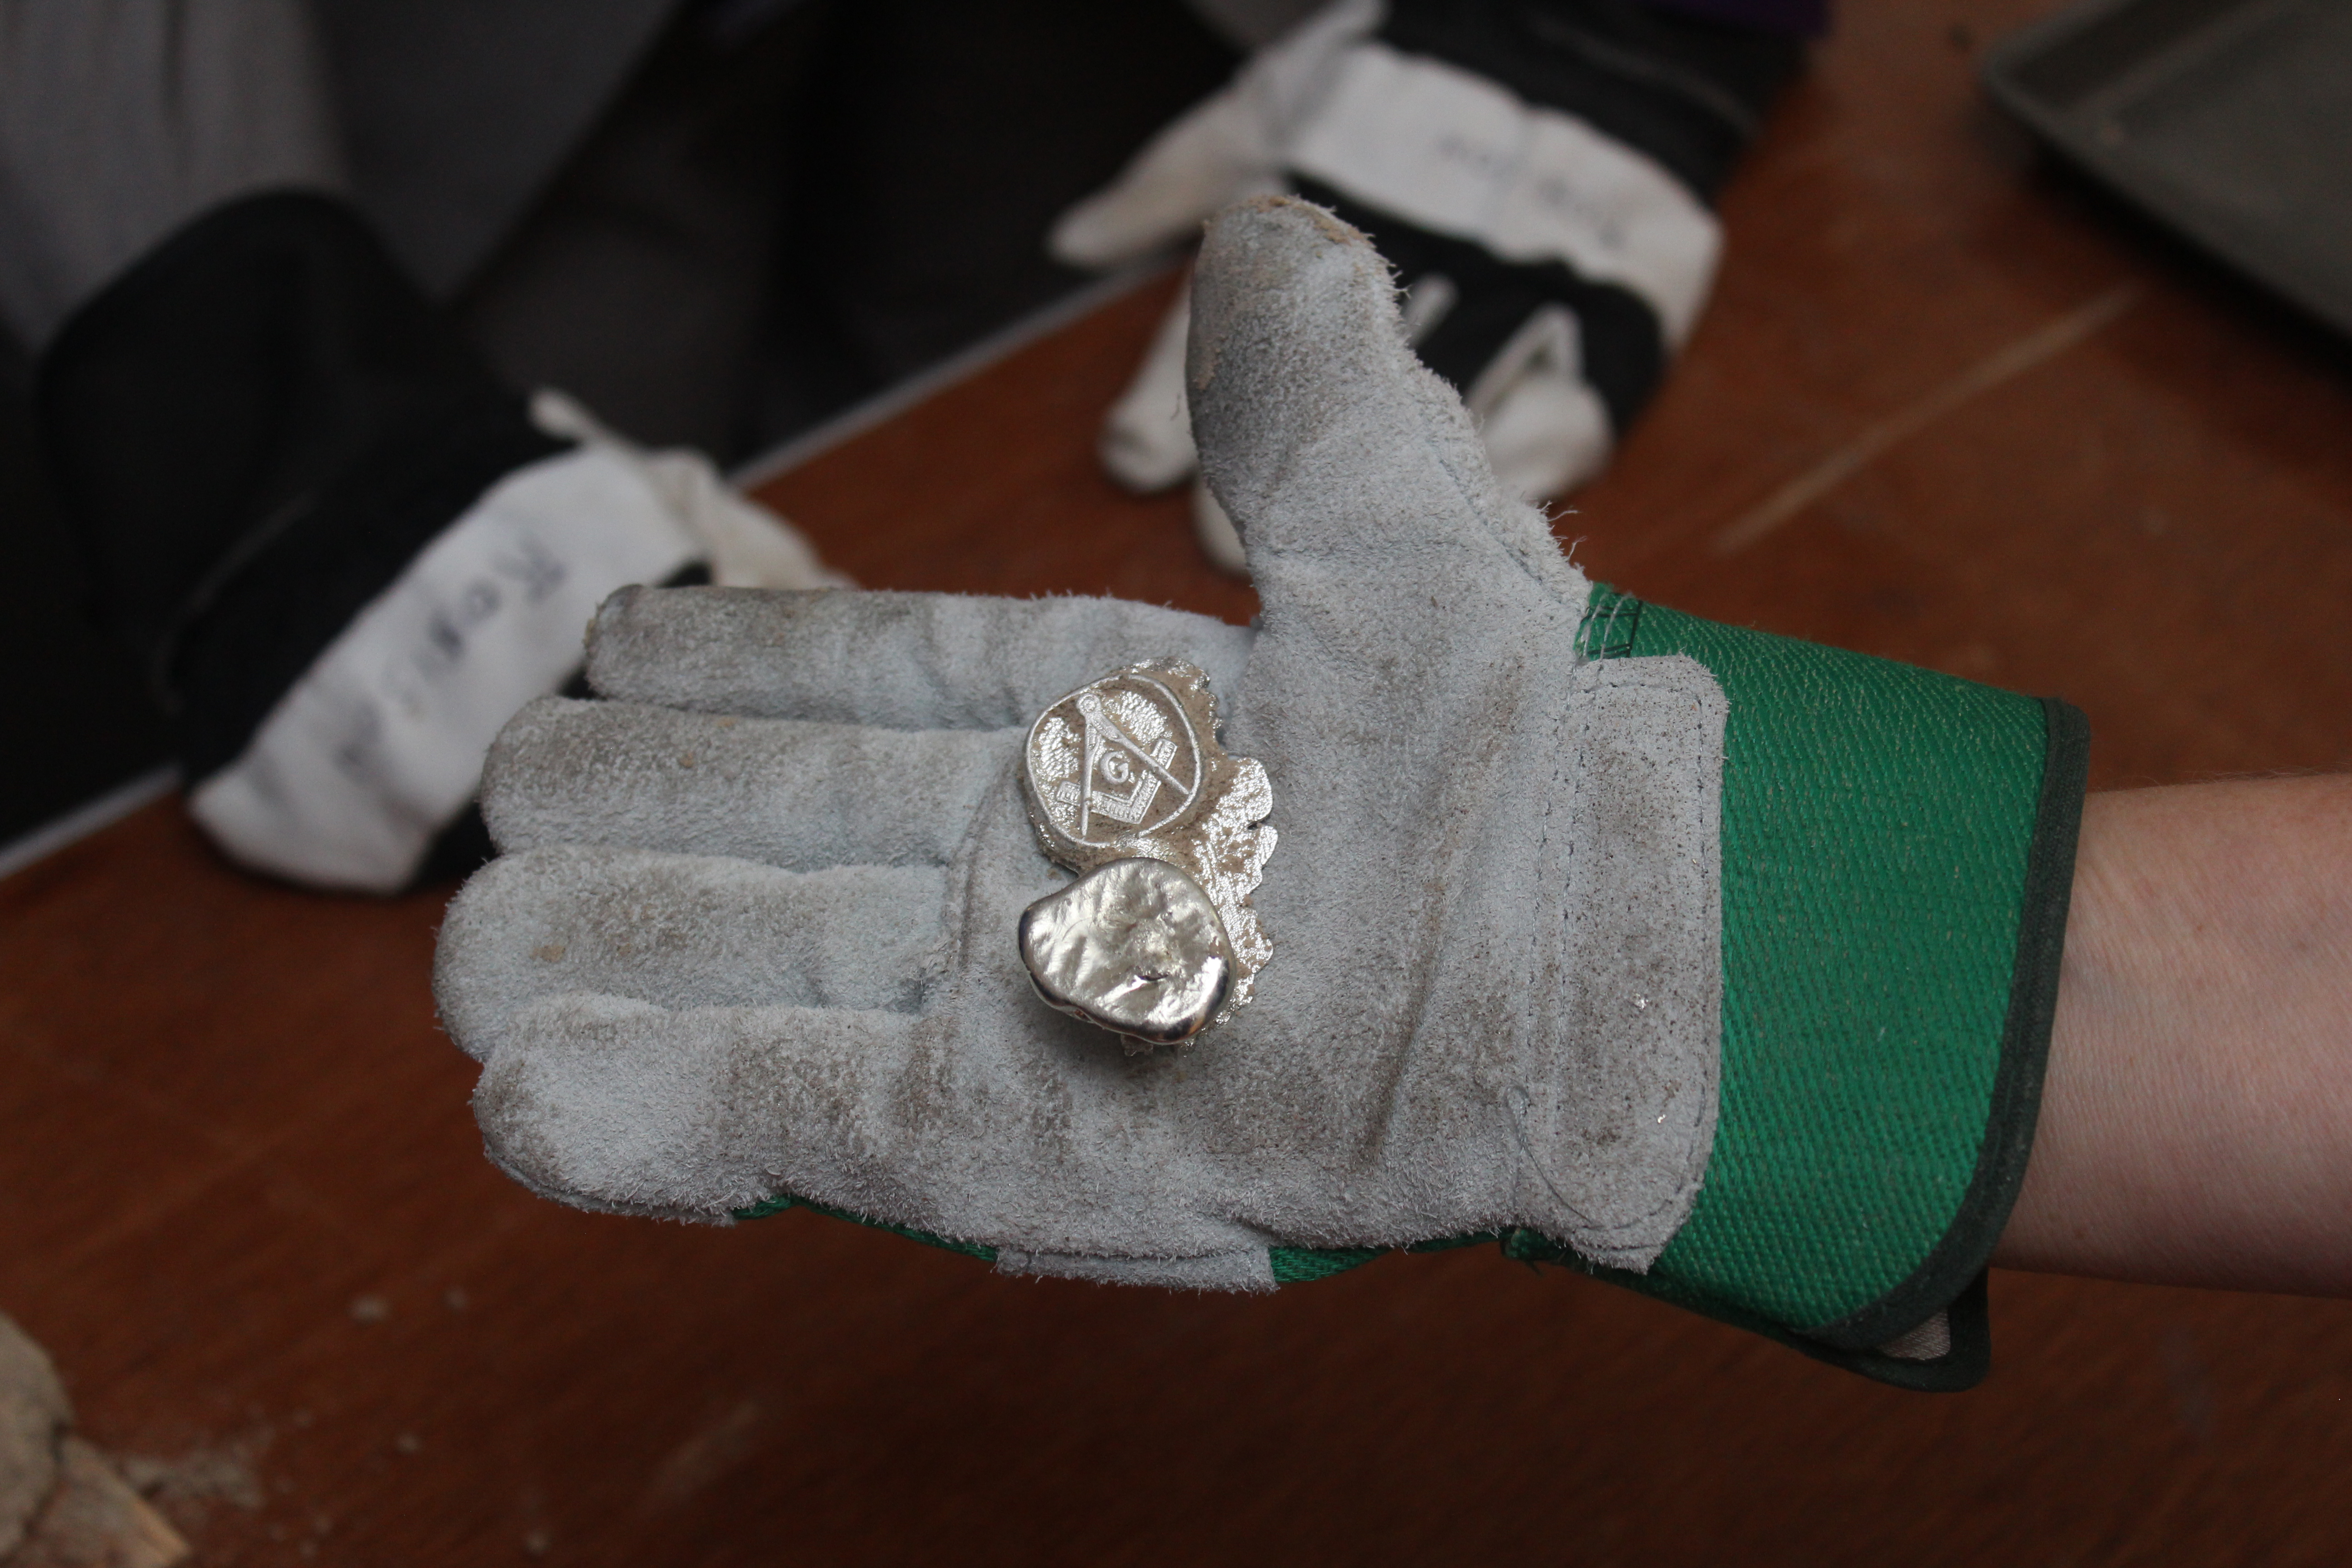
- Break out the mold over the molding sand container so that you can recover the sand for re-use.
- Grip the casting by the sprue with the pliers and brush off any excess sand.
- Using the snips, cut off the castings and then remelt the gates and sprues.
- CAUTION!! Gates and sprues can be remelted, provided they are absolutely dry. Do not put wet sprues and gates back into any remaining liquid in the crucible. An explosion can occur.
All of the metal can be re-melted and all of the sand can be re-used. The sand washes off of your hands with soap and water. Both the sand and the tin metal are non-toxic.
Videos
Foundry-in-a-Box demonstration